- Structure
- Structure helps Atlassian's largest customers track, manage, and visualize progress across Jira projects
- Overview
- Atlassian Marketplace
- Download Archive
- Cloud Pricing
- Server Pricing
- Data Center Pricing
- Gantt
- Add the power of Gantt charts to Jira projects
- Overview
- Atlassian Marketplace
- Download Archive
- Cloud Pricing
- Server Pricing
- Data Center Pricing
- Deliver
- Build project forecasts to guide team success
- Overview
- Atlassian Marketplace
- Server Pricing
- Data Center Pricing
- Pages
- The Ultimate Jira-Confluence Collaboration Tool
- Overview
- Atlassian Marketplace
- Download Archive
- Server Pricing
- Data Center Pricing
- Testy
- Test checklists extension for Structure
- Overview
- Atlassian Marketplace
- Download Archive
- Client for Jira is now an open source product!
Interactive desktop client for Jira. Available via open source or as a free product.
- Structure Version: 8.3 April 26, 2023
- Free 30-Day Trial
- Download Archive
- Structure.Gantt Version: 3.5 Nov 21, 2022
- Free 30-Day Trial
- Download Archive
- Structure.Deliver Version: 1.0 March 12, 2021
- Free 30-Day Trial
- Structure.Pages Version: 1.7.1 Sep 07, 2022
- Free 30-Day Trial
- Download Archive
- Structure.Testy Version: 2.7.0 Jan 26, 2022
- Free 30-Day Trial
- Download Archive
- Version: 2.1.1 Sep 25, 2017
- Free 30-Day Trial
- Download Archive
- Version: 3.8.4 Aug 21, 2017
- Free Version
- Download Archive
-
- Structure
- Choose your platform:
- Cloud Pricing
- Server Pricing
- Data Center Pricing
-
- Structure.Gantt
- Choose your platform:
- Cloud Pricing
- Server Pricing
- Data Center Pricing
-
- Structure.Deliver
- Choose your platform:
- Server Pricing
- Data Center Pricing (Coming Soon)
-
- Structure.Pages
- Choose your platform:
- Server Pricing
- Data Center Pricing
-
- Colors for Jira
- Choose your platform:
- Server Pricing
JIRA Client Features and Screenshots
Centralized Navigation
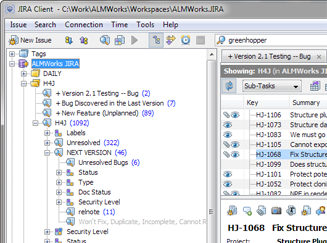
All filters in one place, multiple tabs, fast browsingJIRA Client main window resembles a typical email client — navigation panel with queries and folders on the left, tabs with query results on the right and details panel for the selected issue at the bottom.
Since JIRA Client keeps copies of downloaded issues, it can instantaneously open a tab with a query result or show you the details of an issue.
Multiple tabs allow working with search results from different queries at the same time.
Offline Mode
Use JIRA Client online and offlineJIRA Client lets you search, view, modify and create issues even when you are offline, when JIRA server is not reachable, or when you have a slow VPN connection.
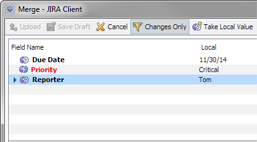
This is made possible by a local database of downloaded issues, maintained by JIRA Client. You change the local copy of an issue, and JIRA Client tries to upload the change when possible. In case of a conflict, JIRA Client offers you to merge conflicting changes field-by-field.
Offline search is supported by synchronized queries — search requests that JIRA Client has already downloaded before. To keep synchronized queries up to date, JIRA Client periodically polls the server for issues updated recently.
Multiple Connections
Many JIRA servers in one placeYou can set up multiple connections to different JIRA servers and have a centralized place to work with issues from them all.
Nested Queries
Drill down with sub-queriesIn JIRA Client, queries are the starting point for working with issues. A query filters issues and displays a tab with the results.
If a query is placed under another query, it will filter the results of its parent query. By constructing a hierarchy of queries, you can organize a large number of issues into manageable subsets.
If your queries are synchronized, JIRA Client also shows the number of issues that satisfy each query at the current moment. This provides you with a quick overview of the current state of the work.
Distributions
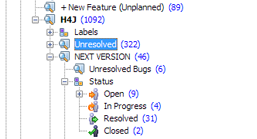
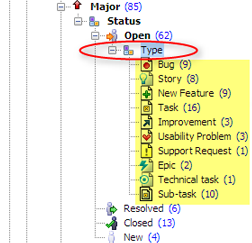
Break down issues by field valuesA distribution by field groups issues by their values in that field. Essentially, a distribution is a number of sub-queries, each sub-query showing only the issues with a specific value in the field.
You can quickly build distributions by Status, Assignee, Priority and other fields, and you also can nest one distribution under another. This lets you quickly get to the issues you're interested in, while preserving context in the navigation tree.
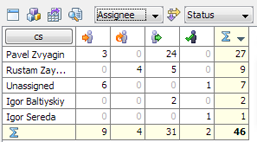
Another type of distribution, 2D Distribution, works in the same way, but it groups issues by two (or even more) fields.
2D distribution table can be shown under the navigation area or in a separate window.
Issue Triage with Drag & Drop
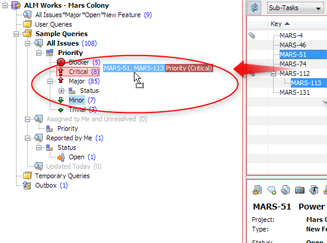
Change issues by dropping them on queriesIf you drag an issue and drop it on a query in the navigation area, JIRA Client will try to change the issue to make it satisfy the query's filter.
You can think of it as if you're actually moving the issues into a "folder", represented by the query. Some queries (like filtering by date or by text) don't support this kind of change, but most queries will let you change one or more issues just by using drag and drop.
So if you do a lot of triage, or evaluating and assigning issues, you can set up a number of queries that represent your typical changes to an issue, and then just drop the issues on them.
Context-Based Text Search
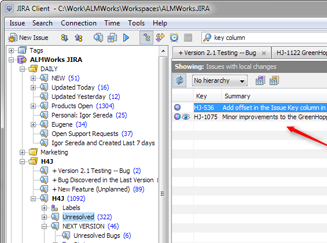
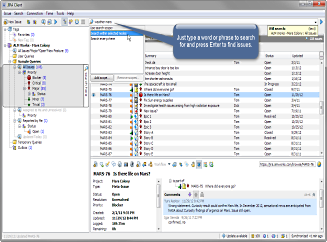
Search within a query result, search using regular expressionsJIRA Client lets you quickly search for issues containing specific words, within a scope — the search is done among the results of the currently selected query.
JIRA Client's search engine finds issues that contain exactly the words (or parts or words) that have been entered in the search field. This provides better quality of the search results in most cases, and makes it possible to search for unusual sequences of characters.
JIRA Client also has in-table search, opened with Ctrl+Shift+F keyboard shortcut, which looks for specified text in the issue table. The in-table search is capable of looking for complex search terms specified by a regular expression.
Integrated Time Tracking
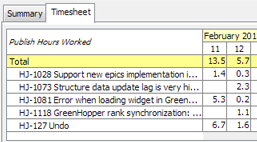
Track time precisely with Start / Stop buttonsSelect the issue you're working on and click Start to begin tracking time. When done, click Stop or switch to another issue. JIRA Client will measure the exact time you've spent on each task.
Later, you can review the time sheet, make corrections and publish tracked time to JIRA as work logs.
Optionally, JIRA Client can detect the periods when you don't use your computer and automatically pause time tracking.
Screenshot Tool
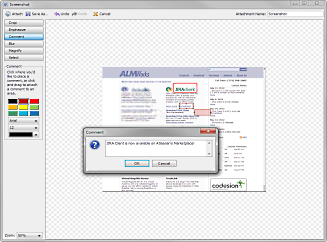
Capture, edit and attach screenshots easilyWith JIRA Client it is very simple to capture a screenshot and attach to an issue.
Screenshot editor lets you crop the image, blur regions with sensitive data, highlight and magnify areas with problems, and add comments on the screenshot.
Local Tags
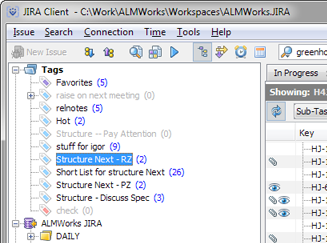
Create arbitrary groups of issuesJIRA Client lets you define tags and apply them to issues. Tags are similar to JIRA's labels, but they are stored in the local database and never uploaded to JIRA.
You can use tags to create groups of issues that cannot be defined with a query. For example, you can tag issues that you'd like to address in the next iteration.
You can group issues from different JIRA connections with a single tag, and tags also may be used in building queries.
Clipboard Integration
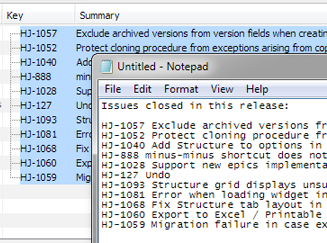
Use Copy & Paste to add issue list to a textSelect multiple issues in JIRA Client and use Copy to place the issues into system clipboard. (Hit Ctrl+C, or Command+C on a Mac.) Then, you can use Paste in any text editor and get a list of links to the selected issues.
In addition, you can hit Ctrl+Shift+C (or select Copy ID and Summary from the context menu) to copy the list of issue keys and summaries to the clipboard — this list can be used as a part of a version control commit message or in release notes.
ALM Works is a part of Tempo Software.

